How to add Header Fields To a Flat Files in Informatica Power Center using “Header Options”? This is one of the quick & easy way to print the header columns in the target flat file. In this example I am creating a csv target file with Pipe delimited.
Also read another option solution using “Header Command“
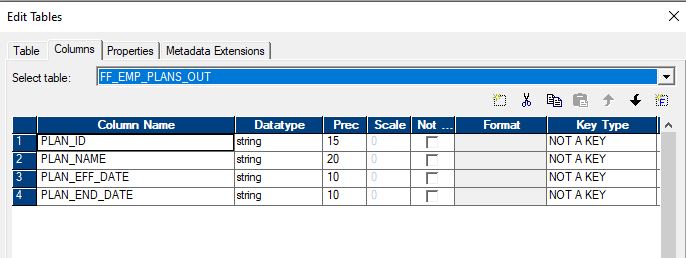
- Create the target file instance with port name same as the names which you want as Header columns
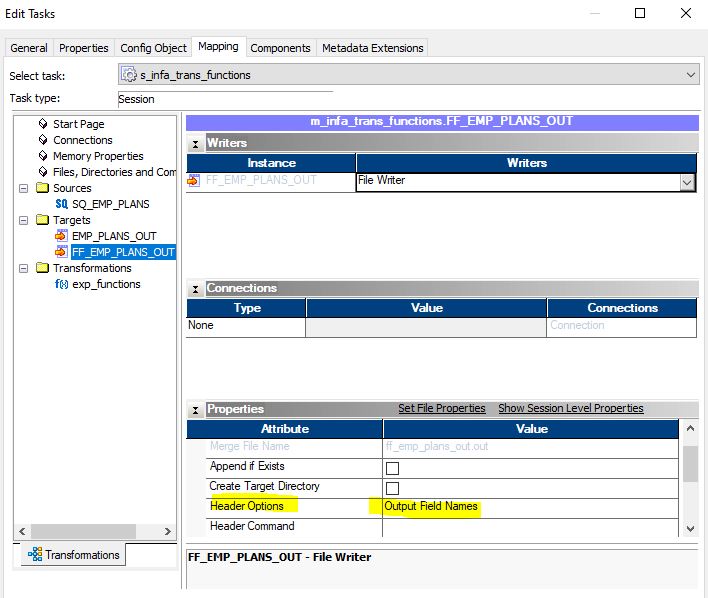
- Configure the header options as “Output Field Names” in the session level
- Configure the custom property RemoveOutputHeaderHash to remove the hash symbol from the header
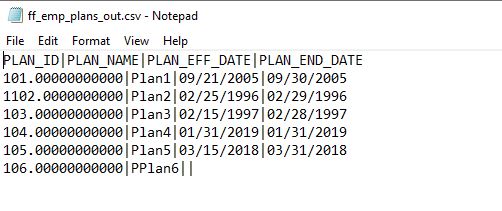
- That’s all, You will get the desired Header columns in the target file
Let’s see this in detail by going through few screen shots. This option takes the port names from the target transformation in Designer and adds them to the target file as is.
- Edit the session corresponding to the desired flat file
- Under the Mapping tab select the target flat file
- Scroll down to the Header Options section of the Properties.
- Select Output Field Names
However, this method results in a # symbol appended to the beginning of the header: To remove the # symbol:
- Edit the session corresponding to the desired flat file
- Select the Config Object tab
- Create a new custom property with the attribute RemoveOutputHeaderHash and the value Yes.

Now the output will have no # symbol and will produce the desired result:

Have any questions? or need help with this topic, please do reach out to me at kvtinformatica@gmail.com. Don’t forget to follow my Youtube channel and FB page, Lets stay connected and learn together.

